As I stated previously that I am a great elementary OS fan and installed the latest beta of elementary OS titled “Freya” few days ago. Now, it’s time to customize it and making it ready as my primary development environment. The first thing I am going to customize is my terminal because I am not that much fan of the default bash terminal.
First, I am going to install Guake to change the appearance behavior of my terminal. I really liked the drop-down approach of Guake which helps me to work without any flaw with so many things within the workspace. I can just press the “F12” key to toggle the visibility of my terminal after installing Guake. There are couple of others handy customization options available too.
So, let’s install Guake. First we may update our system by running the following command on the terminal:
sudo apt-get update && sudo apt-get dist-upgrade
Then run the following command to install Guake:
sudo apt-get install guake
There may be some others dependencies that need to be installed. If needed, you may install those.
After installing Guake, you may run it from the terminal by just running “guake” on the terminal or from the Applications menu.
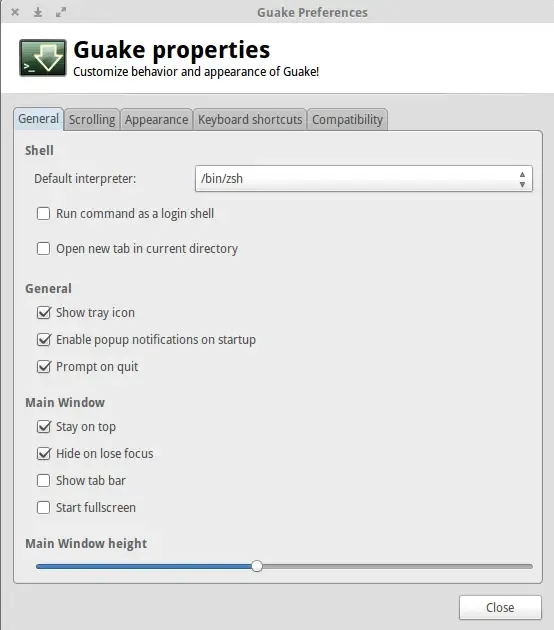
You can customize the preferences according to your need by right clicking on the Guake terminal and clicking on the Preferences option.
To use it instead of your default Terminal, you will need to add it on the Startup Applications so that every time you run your system you can use Guake immediately by just pressing “F12”. You may also change it according to your need.
To add Guake on the Startup Applications, go to your “System Settings” and select “Applications”. Then click on the “Startup” tab. Click on the “+” icon placed at the bottom left of the screen and select “Guake Terminal” from there.
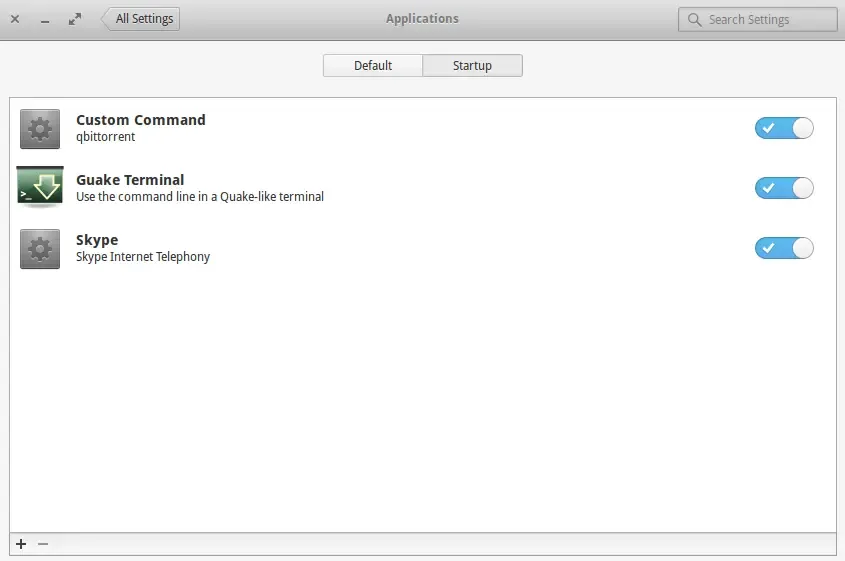
From now, every time you start your system, Guake will run automatically.
Next, I am going to install oh-my-zshas I like it very much. But first, I need some other things to install first such as curl, git, vim and zsh.
To install them run the following:
sudo apt-get install -y curl git vim zsh
Then we can use the automatic installer to install oh-my-zsh on our system easily.
curl -L https://raw.githubusercontent.com/robbyrussell/oh-my-zsh/master/tools/install.sh | bash
After installation, we just need to set oh-my-zsh as the default terminal from our Guake terminal. To do that open the Preferences option and just set “/bin/zsh” as the default interpreter.
Re-start the terminal now. And we will be ready to go 🙂
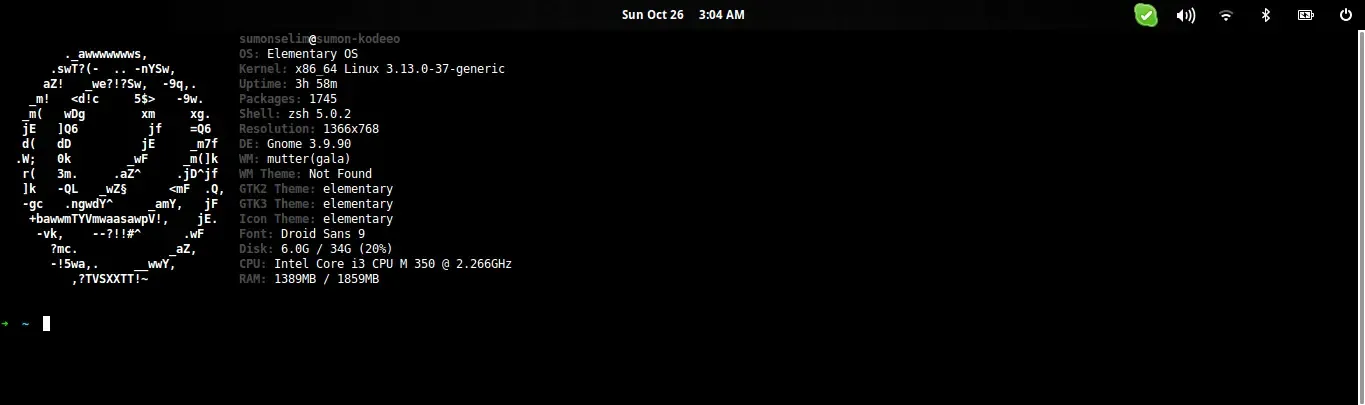
At last, I will add screenFetch to add some system/theme information in terminal. For elementary OS, run the following commands on terminal:
mkdir screenfetch
cd screenfetch
wget https://raw.github.com/memoryleakx/screenFetch/master/screenfetch-dev
sudo mv screenfetch-dev /usr/bin/screenfetch
cd ..
rm -rf screenfetch
sudo chmod +rx /usr/bin/screenfetch
Thanks to memoryleakx for his screenFetch special version for elementary OS.
At last, we have to add the following line to the end of our .zshrcfile:
screenfetch -D "Elementary"
Here’s the final look of my terminal:
Let me know what you think of it!